Tuesday, March 13, 2012

Master Bedroom Makeover

I have been working on my bedroom makeover off and on for about 8 months now, but in the past couple weeks I have really been focused on finishing. I never realized how hard it was to find specific items within a specific price range. I feel like every time I saw something I liked it was either too expensive or I didn't have any money to spend at that time on home decor. I still have a few things that I would like to get for the room, but it is about 90% finished, so I thought I would go ahead and share the transformation.

I of course didn't take any pics of what the room looked like right before I recently started changing things, so all I have are pics from when we first moved into our home 3 1/2 years ago. I am kind of embarrassed to show you these pics because my decorating style has come a LONG way since then, but it will give you a better idea of a before and after.

BEFORE


Terrible isn't it?? Hopefully you will enjoy the after much better.

AFTER


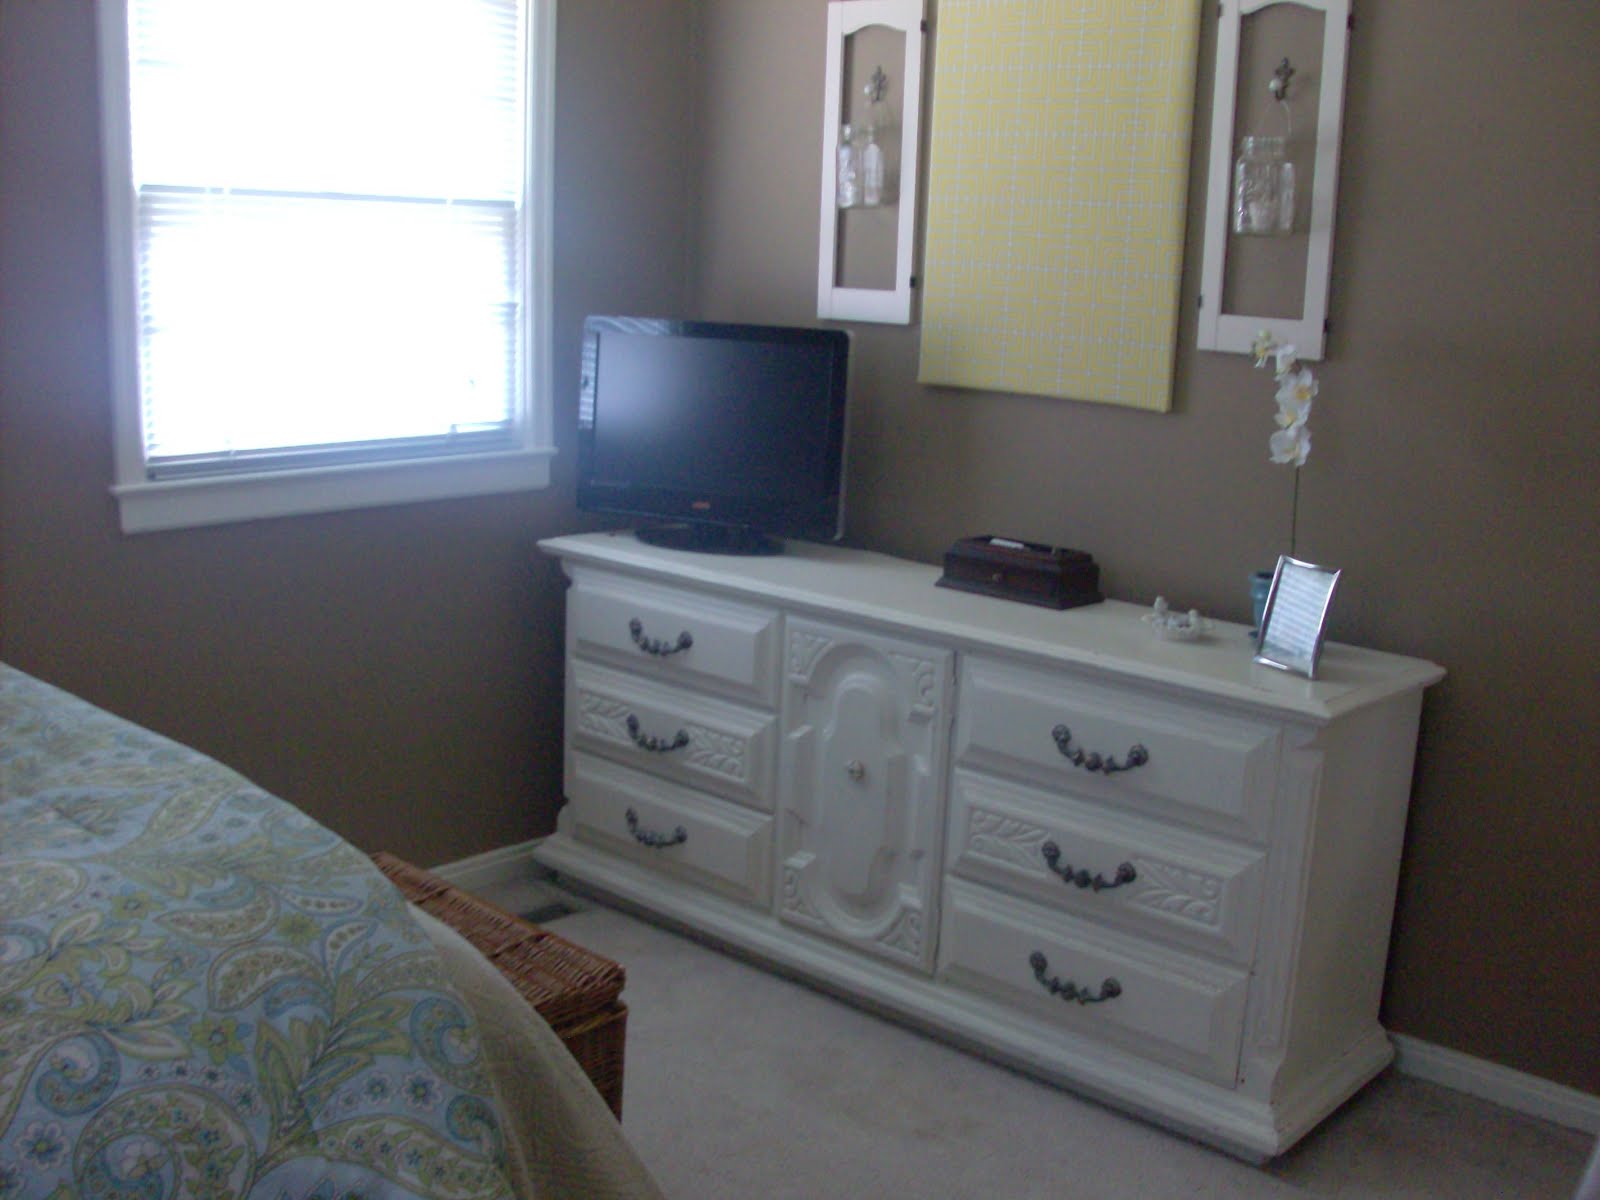
So what do you think?? I happen to LOVE my bedroom now, and can't wait to get it 100% complete! I am still looking for a round pedestal table to replace the current nightstand. I would like to find one that is in not so great condition because I want to paint it a pale blue color to match the blue in the bedspread. I am also needing some storage baskets for the closet and a new hamper, because the one I am currently using used to be my parents and they had it when I was little, so it is pretty much falling apart. I just haven't seemed to come across one that I really love.

Here are some details on the room:

Bedspread and accents pillows- TJ Maxx last year
Lamp- Hobby Lobby
Frame and "G"-Hobby Lobby (spray painted white by me)
Botanical prints- free printable found here
Jewelry Box- JC Penney (gift from hubby and painted white by me)
Dresser-hubby's that I painted and distressed
Wall Art- Canvas covered with fabric
Shutters- re-purposed from mom and dad's house
Ball Jar candle holder-made by me
Fleur de lis hooks- Hobby Lobby
Bird Dish- purchased at a local consignment shop and painted by me (inspired by this at PB)
Framed Picture- wedding gift (watercolor painting of our wedding venue on our wedding invitation)

If you have questions about anything else I didn't mention or you would like to know further info. about something I did mention, just shoot me a message and let me know. Thanks for stopping by and touring my bedroom. Until next time, BYE!!

Partying at Savvy Southern Style for Wow Us Wednesdays

Sunday, March 11, 2012

Mmm Mmm Mondays #15

I promised you all that I would have a recipe this week, and I am not one to break promises. I am super excited to be sharing this recipe with you all this week, because it is probably one of my favorite recipes that I have made in a while. You all already know that this girl LOVES pasta, but what you didn't know is that I also love seafood! Not quite as much as pasta, but it comes in fairly close. When I came upon this recipe from The Pioneer Woman on Pinterest, I knew right away that I wanted to try it. Here is what you will need to get started.

Penne Shrimp Pasta a la Betsy

You will need:
3/4 lb penne pasta
1 lb shrimp
3 tbsp butter
3 tbsp olive oil
1 small onion
2 cloves garlic, minced
1/2 cup white wine or chicken broth
1 can tomato sauce (8 oz)
1 cup heavy cream
fresh parsley-to taste
fresh basil-to taste
salt and pepper to taste

To get started boil a pot of water and cook your pasta as directed on the package. I usually cook mine about 10 mins.

While your pasta is cooking, heat 2 tbsp butter in a large skillet, then add 2 tbsp olive oil.

Chop your whole onion finely and add it to your skillet along with your garlic. Begin cooking, stirring occasionally.

While that's cooking, pull the tails off all your shrimp and then cute them into bite sized pieces. (*In the original recipe she bought uncooked shrimp and then cooked them herself, I opted to buy fresh pre-cooked shrimp to skip a step, plus for some reason it is cheaper than the uncooked frozen stuff)

Now back to your skillet. Once the onion and garlic have cooked down a bit add your white wine. I opted to use chicken broth because I didn't have any wine on hand, which I wish I had, but next time I will for sure use the wine. The chicken broth still did the job though, so if your not a wine drinker don't worry about it.

Next add your can of tomato sauce.

Stir together well.

You will then add your 1 cup of heavy cream.

Stir that together well. You have just made a tomato cream sauce, give yourself a big pat on the back just like I did!! :)

Add your shrimp to the cream sauce and stir together.

The recipe called for fresh herbs but to be honest I forgot to pick them up at the grocery store before making this meal, so I just used the good ol' dried stuff I already had at home. It still worked, just didn't give it that punch of fresh flavor. Add some salt and pepper to taste as well.

Go ahead and drain your pasta and add it to your skillet.

Give your skillet a big stir. Go ahead and taste it one more time to see if any salt or pepper need to be added.

Once your done, serve it up add a little fresh grated parm on top and Enjoy!

Like I said this dish was a BIG hit with me and hubby quite enjoyed it too. I will definitely be making some more of the Pioneer Woman recipes in the future. I will definitely be adding this one to our "go to" dinner ideas. Hope you enjoy it as much as we did. Until next time, BYE!!

Sunday Funday!!

Today was a gorgeous day and sweet pea and I spent the majority of our day at mom's house hanging out with my sister, her little man, and my mom of course. For once I am going to let the pictures do the talking. Enjoy!


I am so excited because Spring is almost here. Happy Sunday!!

Thursday, March 8, 2012

Mirror Makeover

Since Spring is quickly approaching I have been up to my normal routine of moving things around the house and sprucing them up. I get sick of looking at the same old things after a while, so I like to make some changes around this time of the year. I walk past this mirror about 100 times a day and decided yesterday that it needed a little face lift.

I had been wanting to make a book page wreath for a long time now, so instead of that I decided to make a book page mirror. Mom had given me an old book of my dads so this project ended up costing me nothing. I like those kind of projects, and so does hubby's wallet! Here is what I needed to get started.

Once I tore a bunch of pages out of the book I started rolling them up. Roll the page lengthwise like so.

Until it looks like this. (Sorry for the ugly sore on my thumb, it's a battle wound from shopping at the consignment sale mentioned in the previous post)

Once its rolled all the way, fold the bottom about 2/3 of the way to the top, like so. Secure the fold with hot glue. Continue those steps until you have made enough to cover your whole mirror/wreath.

Start by placing the pages at 12, 3, 6, and 9 o'clock. Place a strip of hot glue on the bottom of the fold and glue into place.

Work your way around the mirror/wreath until it is completely covered.

It will look like this when you are done.

To fill in the middle. I repeated the same step of rolling the pages lengthwise and then I cut the tube into 3 pieces. I then glued them into place just like the others. This is what you will have when that step is done. As you can kind of tell in this photo, there were still some gaps that needed to be filled, so I repeated the inner smaller tubes on the outer edge, placing them in between the larger ones.

This is what it looks like after its all done. Sorry for the horrible pictures, but my camera stinks and it was also nighttime when I finished so I didn't have the best lighting.

It kind of reminds me of a sunburst, and I quite enjoy it!

I like seeing the reflection of my magnolia plates in the mirror.


I tried to get a good close up of the layers. Can you see the small layer stuck in between?

I think it adds a little more brightness to our living room. What do you think?

I hope this tutorial made some sense, because I kind of made it up as I went. If you have further questions, shoot me an email or leave a message on this post and I will try and answer it as best as I can. I have some other projects that I plan to share soon, so stay tuned. Until next time, BYE!

Linking to these fabulous parties: